Like Honey: Family
Showing posts with label Family. Show all posts

Lucy's Bookish Birthday Party


 The apple clearly doesn't fall far from the tree in our family. My daughter, Lucy, is a huge bookworm and loves to read anything she can get her hands on. I love that so much about her! I had the idea to throw her a book themed birthday party this year and she was thrilled! Here is a peek at what we did:


THE INVITATION


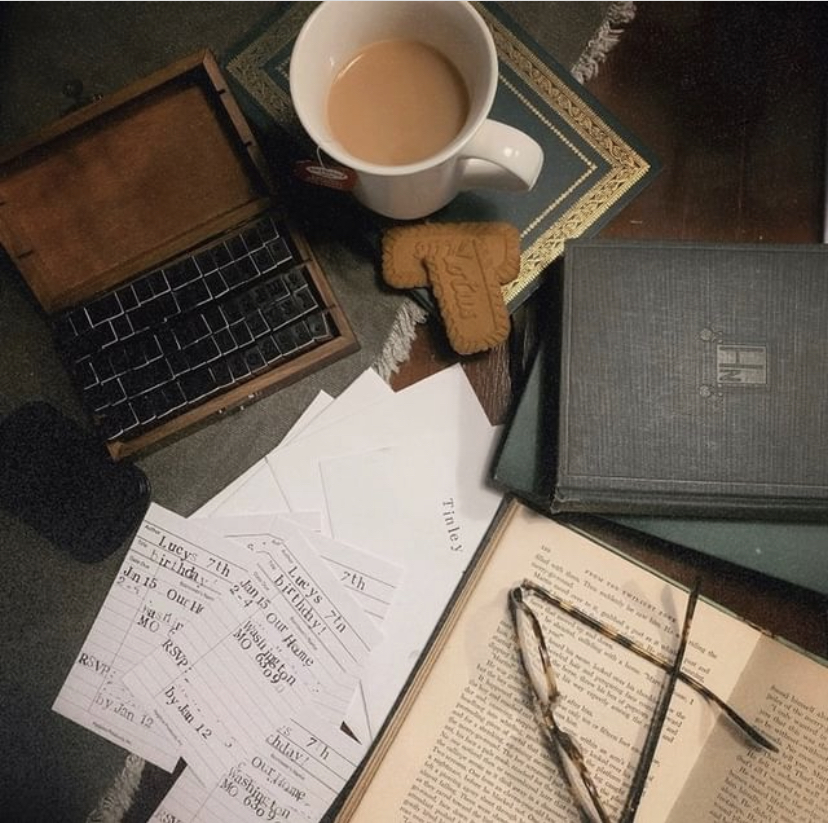
Leave it to me to make the most obnoxious DIY, but honestly, stamping these all out was very relaxing! I got an alphabet stamp kit from Amazon and a pack of blank library cards and set to work one evening. They turned out so cute!

 Pro tip: if you're stamping the same word on multiple cards, it's easiest to go one letter at a time across all the cards--it saved me a lot of time and struggle to find the little letters over and over this way!


THE DECOR


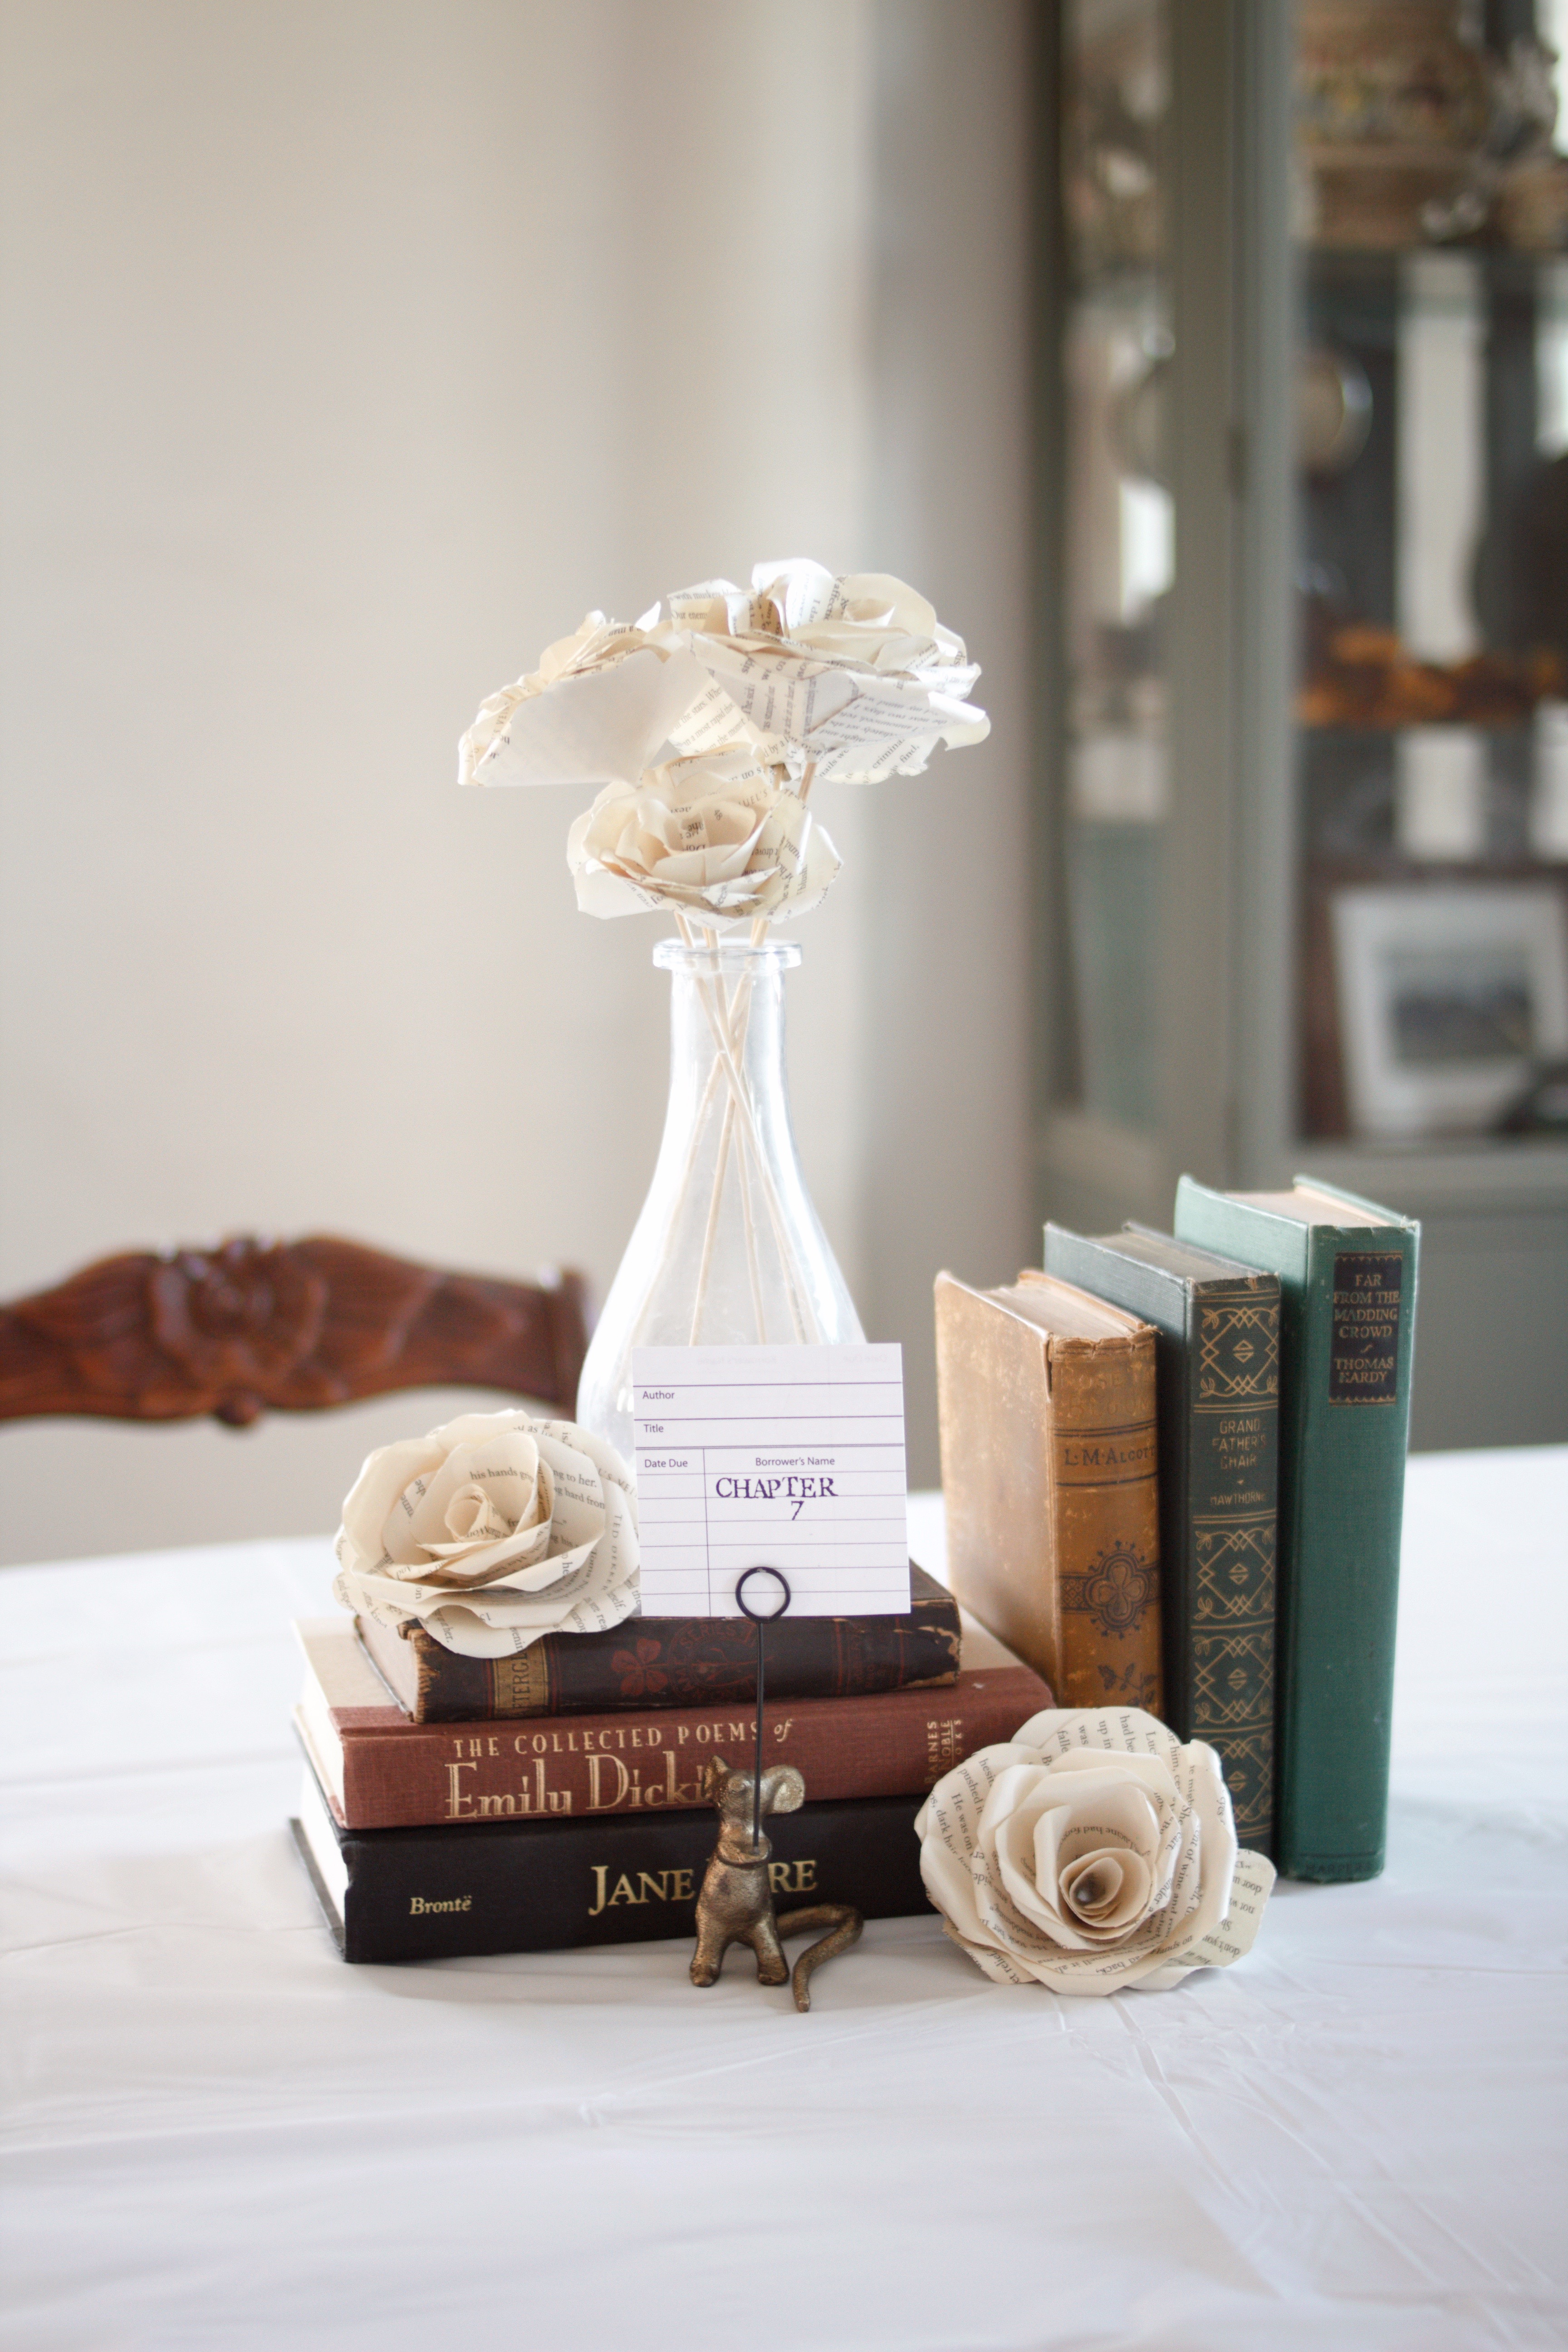
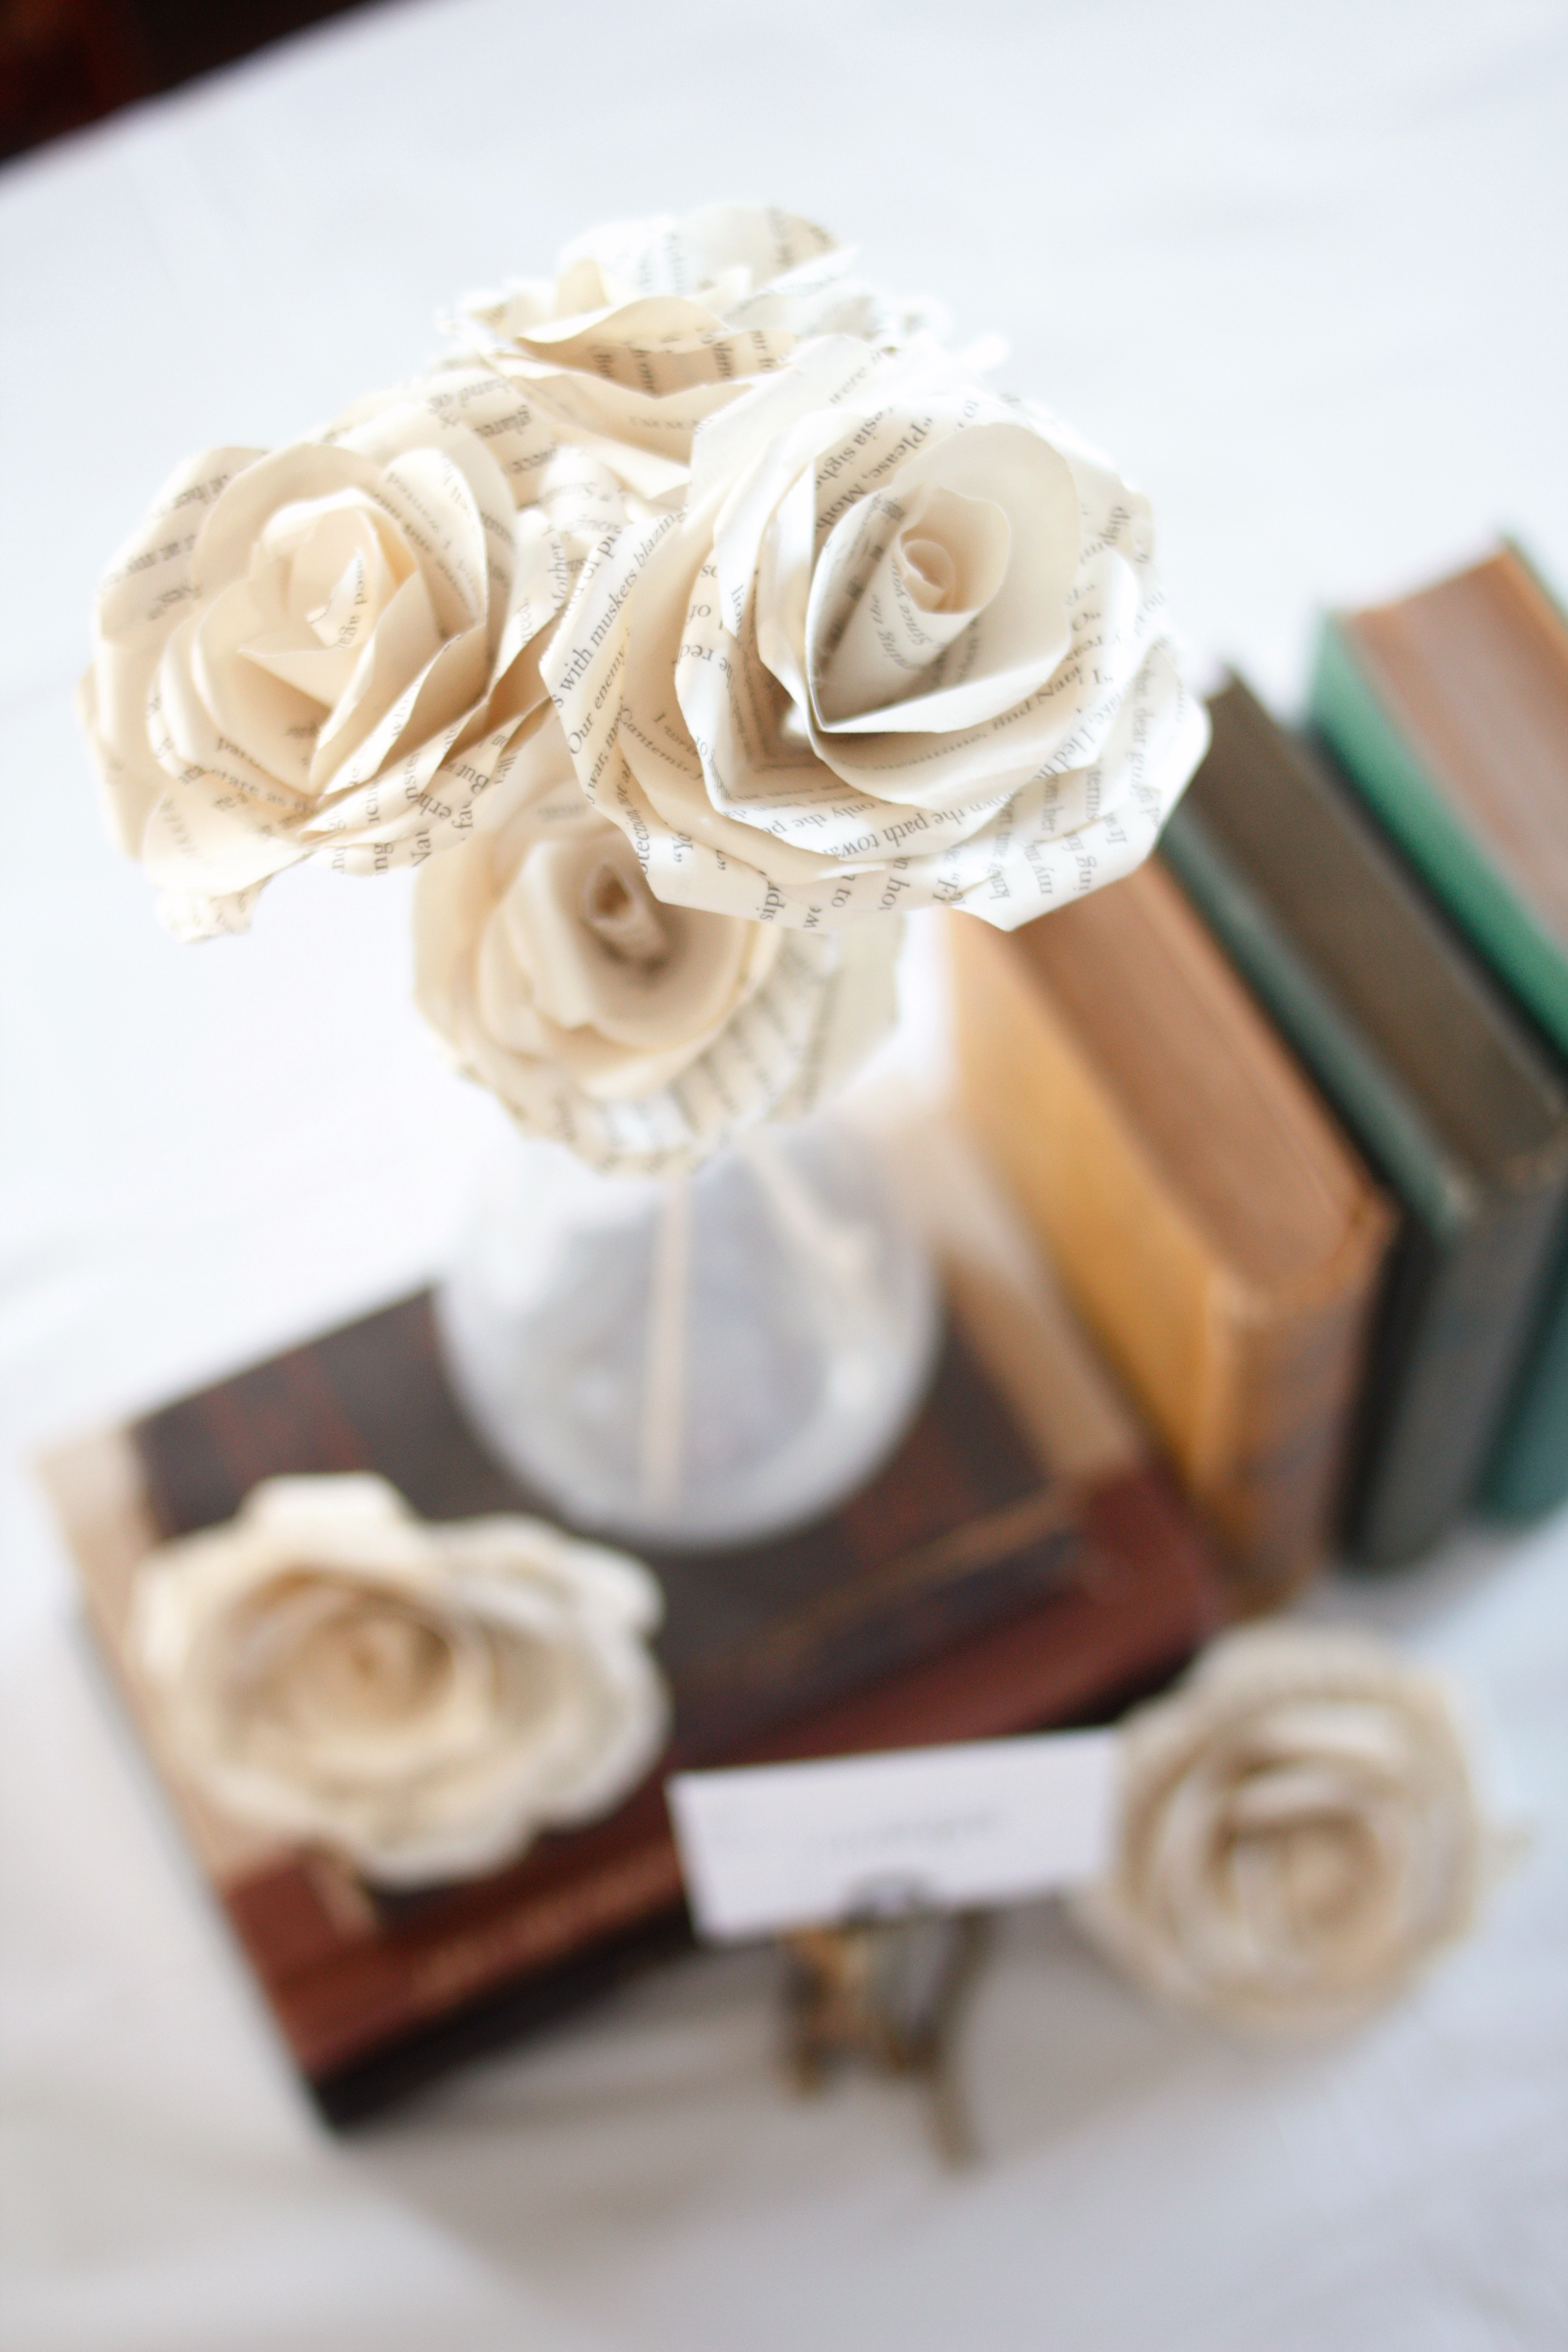
It's pretty easy to decorate for a book themed party when your house is basically a personal library! I just set out a few of my antique books and hit Goodwill for a couple more that I could tear apart to make these cute book page roses.


The book page flowers turned out so cute! It was a little time consuming, but worth it in the end. I'll be repurposing these into decor in my library and on Lucy's bookshelf in her bedroom. Here's a link to the how-to post I followed to create them.


We also added a little banner to the favors table. I stamped out a few favorite literary quotes by famous authors and strung them on a bit of twine. Super simple and cute!


THE FOOD


How can you have a book themed birthday party without a book cake? All we did was stack two rectangular cakes on top of one another and carve a little "v" in the middle to make the ends sort of slope in like the pages of an open book. I added a little fruit leather "ribbon", too.


For snacks, I thought we'd do a play on words with things like gummy "bookworms" and "smart" cookies. For a savory option, I used a permanent marker to make cheese stick wrappers look like pencils. Pretty simple and easy to grab and go!


THE ENTERTAINMENT


Every reader needs a good bookmark in their arsenal, so I thought the kids could make their own! Amazon had a pack of blank bookmarks and tassels and I just added a few crafty things I thought the girls would enjoy and let their imaginations do the rest!


THE FAVORS


I don't always do party favors, but when I saw these tiny composition notebooks at Walmart (3/$1!), I just knew they'd be the perfect thing for our bookish birthday party! I grabbed a box of alphabet cookies and a pack of cute pencils from Michael's (48 ct for $5!) and we were all set.


I think Lucy's little literary party was a success! I think it would be super cute to host a bookish party like this at the library, too! Maybe we'll consider that another year. What about you, would you host a book themed party?


0

What Do You Get a Baby for Christmas? 30+ Gift Ideas for Newborns, Babies, & Toddlers


Do Newborns Really Need Christmas Presents?

Honestly, if it was just me, I wouldn't buy our newborn a single Christmas gift. Well, maybe just one or two. But when you have a 4 and 5 year old who are in their Santa-believing prime, you kind of have to go through the whole wrapped presents and stocking thing even with the newborn. Santa wouldn't leave out the baby, would he?!


What Do You Get a Newborn for Christmas?

Newborns really only need like 3 things: milk, diapers, and naps. All the prep-work that comes with having a baby pretty much covers everything else. Our little guy will be about 1 month old at Christmas this year, so he's not going to have much of a wishlist. Since we're already fairly equipped to take care of his immediate needs, I'm using this opportunity to give him some items he'll be needing in the near future!


There's no point buying more of what you already have and there's still no need for larger items like tricycles or toddler beds, so don't worry if your baby isn't receiving any "big" gifts this year. Next year will be SO much more fun! Grabbing a few things you know you'll be purchasing within the next few months is a great way to kill two birds with one stone and not add unnecessary spending to your already stretched holiday budget.

More Gift Ideas for Older Babies


Honestly, even if your baby is past the newborn stage, they probably don't need much! Take advantage of the savings you have while they're too young to know the difference and get them some things they'll need later or just scale back on what you probably want to buy--I know I always go over my budget with my kids because I just want them to have everything! Use these early years as a chance to save up and invest in their future, whether that be saving for a bigger yard or just saving for the next size car seat. I promise it will pay off in the end!


Have you ever had a newborn over the holidays? How did you handle the gift-giving? Feel free to comment with any suggestions you have or items you loved!


0

We Created a Mini-Nursery in Our Master Bedroom!


*DISCLAIMER: I was gifted items from DaVinci in exchange for my review. All opinions are my own. This post may also contain affiliate links. I will earn a small commission, at no added cost to you, when you purchase through my links. Your support is what keeps Like Honey up and running and is SO appreciated!*


When we found out we were pregnant with baby number three while in the thick of a complete home restoration, we knew we didn't want to overhaul an entire room just for a nursery. We already have a girl and a boy, so whichever gender we ended up with would ultimately just share a room with a sibling.

Now we're just weeks away from welcoming our second little boy and while we have lots of fun plans for a shared boys' room in the works, our newest arrival won't be needing a whole lot of space just yet. I didn't want to convert a whole bedroom into a shared room/nursery only to have to convert it back into a big boy room for two in another year, so I decided to take advantage of the little dormer nook in our master bedroom and turn it into a perfectly sized mini-nursery! Not only will it be super convenient to have our little guy right in our room, but it also allows me to maintain an aspect of minimalism--even using some items I already had in my home--which lowers my budget, too!


The key to making a mini nursery or nursery nook happen is finding the perfect crib. I searched high and low for something that wouldn't stray too far from a traditional nursery feel but not take up the same space as a full-size room. We ultimately chose the Kalani 4-in-1 Convertible Mini Crib from DaVinci and are SO happy with it! It has the quality and construction of a standard crib but its smaller scale allows it to fit in almost any space!

If you're worried about leaving room to grow, the convertible 4-in-1 option is perfect for you! Literally 4 beds in 1, it switches from infant crib to toddler bed to daybed to twin bed (with a conversion kit)! The size is really about the same as a standard crib in width, so the only thing you're really sacrificing is a little length. I expect to use this as our only crib until our son is ready to transition to a regular twin size. If you're still uncertain about what size crib will work for you, DaVinci also has a handy Crib Buying Guide that breaks down everything so simply!

I also want to mention how easy this was to put together! My husband had it ready to go in less than an hour and it feels so sturdy and secure! I'm really impressed by the craftsmanship, especially for the price (the shipping time was fantastic, too)!


Obviously, every nursery needs a crib, but what else do you really need? I know a lot of people swear by a glider or rocking chair for those late night feedings. DaVinci has a ton of beautiful glider options, but as I mentioned before, I wanted to create this nursery on a minimalist budget using some items I already had around the house. I actually got the idea to move this wooden rocker from Parker's old room to our master and love how well it matches to wooden crib! The rocker belonged to my grandpa, who passed away in 2013. I love that I am able to have a little family heirloom that is also functional in this precious space.

The last thing I thought to add was a small side table. I found this one in a coordinating color on Amazon for under $40 and plan to repurpose it in another space when our nursery days are over. It's the perfect size for holding a few necessities, a tiny lamp, and a sweet little photo. I know it will be so handy to have those items nearby during exhausting, long nights!


So, What Exactly Do I Need?


Truth be told, a nursery of any size doesn't need all that much. When you're working with a small space or going for minimalism, you need even less! Here's a breakdown of everything I put in our little master bedroom nursery nook with links for you to shop if you're in the market:

Mini Crib: We went with the Kalani 4-in-1 Convertible Mini Crib by DaVinci. It comes in multiple finishes and is just the right size to grow with my baby but still fit in tight spaces like this attic dormer in our master bedroom. We chose the finish "espresso", which is a perfect warm, dark wood tone.

Crib Mattress: DaVinci also offers several mattress options for all of their crib sizes, but we ended up going with this one.

Crib Sheets: When shopping for crib sheets for a mini crib, make sure you're getting the right size! Standard crib sheets will be too large, but "portable crib sheets" or "playard sheets" are the perfect fit! I got this pack of two for less than $10 here--super soft and comes in tons of color combos!

Accent Rug: Totally optional, but a small accent rug might help make your space feel more "finished", especially if you're just using a small corner of your room. Budget Tip: I plan to repurpose this rug on my front porch when we outgrow this space, meaning I can get two uses out of one product! This one was only $25 at Target.

Rocking Chair: This belonged to my grandfather and was handed down to me when he passed. It usually lives in the boys' room, which is where it will likely end up when we outgrow this space. I saved money and made the space a little more special by opting to use a chair we already had, but DaVinci offers a lot of beautiful gliders in various price points and styles if you're looking for a cute addition to your nursery!

Throw Pillow: Another optional item for most, but for me, I needed a little cushion to go with this rocking chair if I was going to be spending late nights in it! I tried to choose a color that accented the nursery but could also be moved to another space in the house later. I will either leave it with this chair when it moves back to the boys' room or find a place to set it out seasonally (the soft green color is perfect for the holidays!). I found this one at Target for only $20. The tassels are so fun!

Side Table: Functional and cute, this little table actually has a removable tray top! It was less than $40 on Amazon and will serve me so well during late night feedings/diaper changes. I set it up with a tiny lamp I already had and spray painted to match (I've linked some similar options below all under $20), a little decorative basket to hold all my "stuff", and a cute frame (also already owned, but linked a few similar below).

SHOP MY ENTIRE MINI-NURSERY


So what's your take on the nursery nook idea? Would you rather convert a whole space or does the minimalism of a mini space appeal to you? I'm personally loving how efficient this space is and can't wait to see it put to use in a couple of weeks when we welcome our little fella!


0

How to Take Your Own Family Photos


I Took These Photos Myself!


Last weekend, we took to the woods and shot a few family/maternity photos on our own. I set up my tripod, snapped away in between kids' potty and exploration breaks, and did a little editing on my phone (I love Snapseed) and voila! A sweet little photoshoot done in a pinch! I really love how they turned out and can't wait to meet our baby in a few weeks--and do this all again with him included! Hello, Christmas card photos!

Don't get me wrong, I love all of my photographer friends and support them whenever I can, even just online, but to be honest, we simply don't have the budget for professional family photos. In our area, a standard cost is upwards of $300 (sometimes not even including prints or digital images!). I don't want to undervalue a local small business owner, so rather than haggle them for prices I can afford, I opted to start learning how to do them myself. Are they perfect? No, but they do work for me in my current season of life. One day, I'll save up and get amazing professional portraits of my whole family and cherish them forever, but learning to make do with what I have and hone a new skill has been rewarding on several fronts and I highly recommend giving it a shot if you're in a similar situation.

Since I've been taking our own photos for a few years now, I thought I'd share with you a few of the things that have helped me along the way, like what to wear, what tech items I use, and how I get my family (ahem, kids) to cooperate. First things first:

What Should We Wear?


I think aside from the actual click of that camera button, figuring out what everyone should wear is one of the most stressful parts! As women, we tend to overthink things (or at least I do), but as long as you have a little coordination going on, you can totally nail your family portraits! I'm always happy to provide feedback on outfits for your family if you shoot me an email at likehoneyblog@gmail.com. I can work with whatever budget you have, even just using items you already have!

For now, here are a few outfit collections (with shoppable links for everything below!) that can hopefully give you a little inspiration for your own family photos!

Green & Neutrals


This is probably my favorite collection! The colors are just so timeless and if you're planning to frame your photos in your home, these are hues that won't clash with any decor palettes you might have. Here are some alternative options for a similar green & neutral look: don't like dresses? Have mom or daughter wear light wash jeans and neutral sweaters instead! Dad not into sweaters? A solid button front shirt will still look timeless without bringing in too many more patterns.

Burgundy & Cream


This color scheme works so well with snow or evergreen trees! It would be perfect for your Christmas card! I absolutely love the little girl's pinafore dress (such a classic!) and this gingham button front shirt for boys works yet again to tie everything together! Normally, one of my biggest tips when compiling coordinating outfits is to have a good mix of solids and prints (i.e.: don't have everyone in a different pattern or everyone in the same two solid colors), but this look only has one patterned item and still works thanks to the girl's outfit having a bit of contrast with two separate pieces. Never live and die by one single rule when you lay out your outfits! You never know what might mesh perfectly once you have it all put together.

Mustard & Navy


I love how casual this collection looks! Laid back looks are so great for those family photos that are more candid and real, in my opinion. You'll want to look back on your photos and evoke memories of real-life. This rust/mustard color is one of my favorites for fall and pairs perfectly with hues of dark blue. Don't fear mixing khakis and jeans amongst your family--khakis can look less dressy with a careful shoe selection and a roll of the sleeve.

Navy & Emerald


This look is a close second for favorite for me! I love the holiday ready plaids that don't completely scream Christmas! It works great for a Christmas card photo but is still timeless enough to frame in the hall. This collection isn't too dressy, but could easily be spiffed up with a change of shoes and dress pants for the boys. My husband has several of these collared sweaters and throws a button down shirt underneath to dress them up for church.


Don't I Need a Professional?


Of course, if you have the time and budget, I highly recommend supporting a local photographer's small business by hiring a professional! If you already possess a decent DSLR (it doesn't have to be top of the line--mine is a refurbished Canon T5!), all you really need is a couple of accessories and a bit of patience to make great family photos happen in a pinch.

What Do I Need I To Do-It-Myself?


Here are the four tech items that made these family/maternity photos possible:

CAMERA: I have a Canon T5 that we got refurbished for about $250 six years ago. It is still holding up just fine! I promise, you do NOT need a high-end, state-of-the-art new camera to take pretty pictures!

TRIPOD: My tripod actually belongs to my father-in-law, but he rarely uses it so I've kind of just taken custody of it! Amazon has several options that are very affordable and will get the job done.

SHUTTER RELEASE + REMOTE: This was the biggest help to me! No one wants to race back and forth to their camera to click the shutter and try not to miss that 10 second timer (but believe me, I've done it!). The downfall to an older camera model like my Canon T5 is that it does not have infrared capability, which means I can't buy a simple universal remote control or an app on my phone to control it. HOWEVER, this little shutter release has been serving me well for 2 years now and works like a dream! It has a little device that connects to the top of my camera and plugs into a port in the side of the camera body. Then I use the included remote to control that device which acts as an external shutter release! I has continuous shooting (helpful when shooting with wiggly kids!), single shooting, and flash options and cost me less than $25!

A GOOD LENS: Investing in a better lens than the standard one that comes with your camera is so important! I used to have a 50mm I loved, but when it broke unexpectedly, I decided to try a 35mm lens instead. I really like it for portraits, but have a lot of trouble with it when it comes to close up shots like I need for many posts here on the blog. I felt like my 50mm was the better purchase and will be replacing it soon! Either way, do a little research on what lens you think will serve you best for your personal habits and hit up Amazon for affordable options that have great reviews!


What Else Will I Need?


Prep and patience. Seriously.

I'm really not the best at posing. It's hard to tell what your family group looks like when you're standing in the middle of it. Something that has helped me tremendously is scouring Pinterest and saving family photos I love to a specific board that I can reference when planning my shoot. I actually just took a handful of screenshots while we drove to our location and went from there when we took these photos and I am more than happy with the results!

As for patience, that one's easier said than done. I'm easily frustrated and get anxious when we try to do photos, even when I'm not in front of the lens. This time, I prayed ahead of time that God would give me a patient heart and help me be more of a "fun mom" during these photos instead of my usual frazzled and irritated attitude that comes out after the first few shots go south. Wouldn't you know it? The whole shoot went perfectly! We took several small breaks to let the kids explore the area which kept them from getting too antsy while also giving them great memories with dad. We had to stop twice for potty breaks, during which I took the opportunity to take individual portraits of the kids while we waited. Where I normally would have been getting heated and impatient, I chose to enjoy the moment, relax, and remember: if I get just one good photo, that will be enough. It's fine. Promise. And you know what else? My cheerful attitude made for better smiles all around. We were all genuinely happy while taking these photos--no forced smiles, no hidden pinching to correct behavior--and it shows.

What If I Have Babies or Toddlers?


Go re-read what I wrote about patience. Then make sure you bring a few snacks. When my kids were busy toddlers, a bag of fruit snacks could go a long way to making happy smiles and getting little ones to sit still. Don't be ashamed to bribe if you need, to. I honestly bribed the kids with this shoot, too. I told them when we were done they could have a snack in the car on the way home. They were thrilled! Bribes don't have to be crazy, just little incentives to keep them looking forward instead of getting bored and cranky. For babies, make sure they're not getting too close to their naptime if you can. Stopping for a feed halfway through your shoot might be necessary, too. Again, keep calm and patient and your kids will follow suit. Worst case scenario, you have to try again another day--at least you didn't just drop a few hundred dollars!


Have you ever taken your own family photos? What tips do you have for others who might be looking to try it themselves? I hope these outfit ideas and shooting tips were helpful to you! I am far from a professional and learned everything on YouTube or Google, but I'm happy with the results I get and want to share what's working for me with all of you! Good luck!


4
Back to Top